Curved Poly
Intro
General Features
Shape Editing
First Steps into Shape Editor
User Interface and Settings
Operators and Views
Pointings Operator
Vertices
Handles
Edges
Polygons
Selection Operator
Tessellation Operator
Elasticity and Edge Normal
Curved Poly Inspector
Primitives and Demos
Assets and Libraries
Advanced Shape Editing
Hide Operator
Shape Control Operator
UV Operator
Backgrounds Operator
Creation and Composition
Anatomy of a Curved Poly Model
Create Operator
Geometries Operator
Unwraps Operator
Edit Operator - Overview
Edit Operator - Making Custom Primitives
Edit Operator - Inspecting and Fixing
Backgrounds Operator
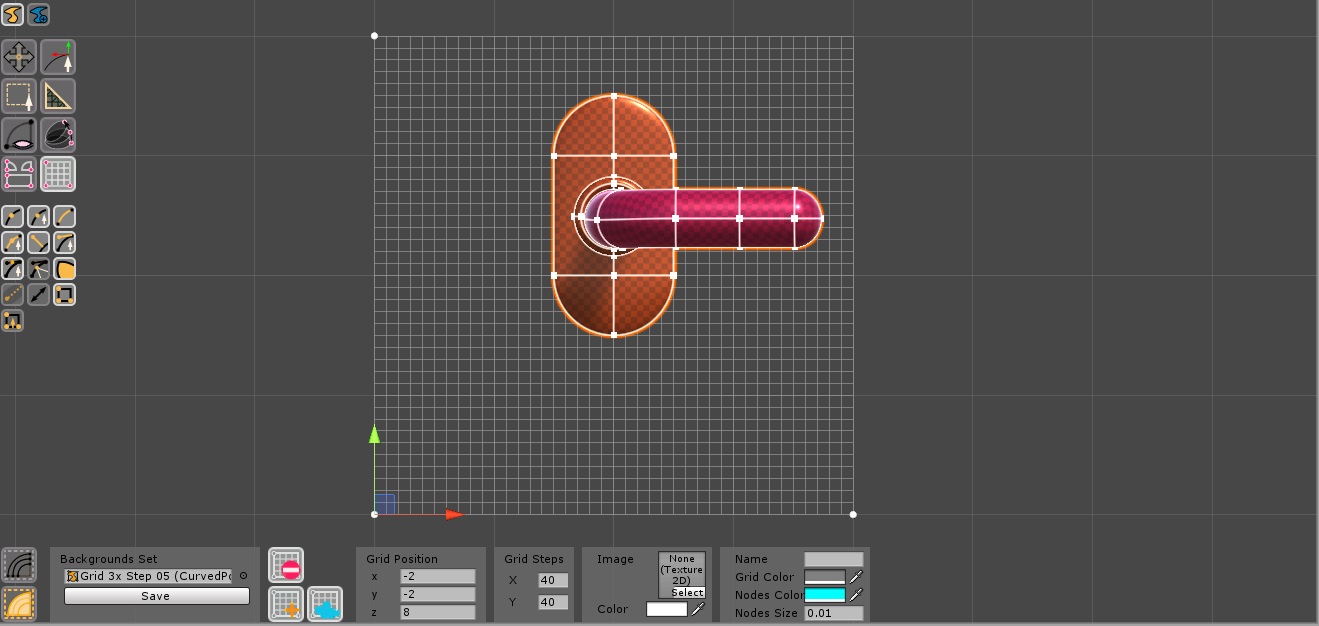
Fig. 1 Backgrounds Operator
A Background (or Grid) is a support 3D element which can contains grids or images (or both). With the Backgrounds Operator you can setup your environment to contain one ore more reference Backgrounds. Grids generated with this Operators can be used in other operators, where you can activate the snap to grid option to snap to any grid in your environment.
Backgrounds Sets

Fig. 2 Backgrounds Operator Menu
All the Backgrounds you generate are stored in a backgrounds asset (type name is CurvedPolyBackgrounds) which contains a set of Backgrouds. The Dynamic Menu in the bottom of the scene View will contain:
- A field to load any previously saved CurvedPolyBackgrounds which you want to reuse on a new model. There are a few premade Backgrounds Sets containing usefull grids you can reuse in your project in CurvedPoly/Extensions/Maker/Grids
- A Save button to save an asset containing all the backgrounds you have generated in your scene view
If you don't load any presaved CurvedPolyBackgrounds, Curved
Poly Maker will start with an empty one. You can create a new Background with the  Add
Background button: a little sphere will appear on the scene view at the position of your
cursor. That will be the position of the first corner of your background. Click to place the background anywhere in the screen, you will be able to correct the position at a second time. Once created the background will appear as a square, aligned with your actual camera with 3 spheres which are the background controls.
Add
Background button: a little sphere will appear on the scene view at the position of your
cursor. That will be the position of the first corner of your background. Click to place the background anywhere in the screen, you will be able to correct the position at a second time. Once created the background will appear as a square, aligned with your actual camera with 3 spheres which are the background controls.
You can now click on the background controls to access it and eventually
remove it with the  Remove Background button.
Background Parameters

Fig. 3 The Backgrounds Operator Menu after a Background has been selected
You can access a specific background by clicking any one of the three little spheres of the background. The three spheres gives you access to controls which allows you change the position and the extensions of the background. Depending on what you click, the menu will have controls to change:
- The Grid Position (Press the bottom left sphere)
- The Grid Width Direction (Press the bottom right sphere)
- The Grid Height Direction (Press the upper left sphere)
If you changed your camera orientation and the background is not
facing you, you can always align the camera to the grid with the  Align
Camera button
Align
Camera button
A Background by default is a grid with only one cell. You can change the amount of cell of the grid in the menu by changing the Grid Steps X and Grid Steps Y parameters. Once you have selected an amount of steps greater than one, in the menu you will find the width and the height (clicking the proper circle) of one single step rather than the one of the whole grid/background.
You can also assign a background Image to your background. You can than assign a color (usually some shade of gray or whatever you want) to modulate the image colors in order to avoid the background image to make confusion with the other controls you will find in other operators. Other parameters you can control are:
- Name: a name for your grid
- Grid Color: the color used to draw grid lines
- Nodes Color: the color used to draw the grid nodes as little spheres
- Nodes Size: the dimensions of grid nodes. If you set this to zero, the grid nodes will not be rendered
Backgrounds in other Operators
When you are in any other operator you will have access to two more options (find them in the visibility buttons set):
 Shows/Hides Grids
  Activates/Deactivates the Snap to Grids option.
Setting Up your environment

Fig. 4 An example of a set of Grids prepared before modeling something.
Using backgrounds can help you work better in many situations in which you need precision or you need to reconstruct real stuff. If this is your case, you should always invest some time coming in the background operator and setting up your environment.
<< Prev Next >>