Curved Poly
Intro
General Features
Shape Editing
First Steps into Shape Editor
User Interface and Settings
Operators and Views
Pointings Operator
Vertices
Handles
Edges
Polygons
Selection Operator
Tessellation Operator
Elasticity and Edge Normal
Curved Poly Inspector
Primitives and Demos
Assets and Libraries
Advanced Shape Editing
Hide Operator
Shape Control Operator
UV Operator
Backgrounds Operator
Creation and Composition
Anatomy of a Curved Poly Model
Create Operator
Geometries Operator
Unwraps Operator
Edit Operator - Overview
Edit Operator - Making Custom Primitives
Edit Operator - Inspecting and Fixing
Edit Operator - Overview
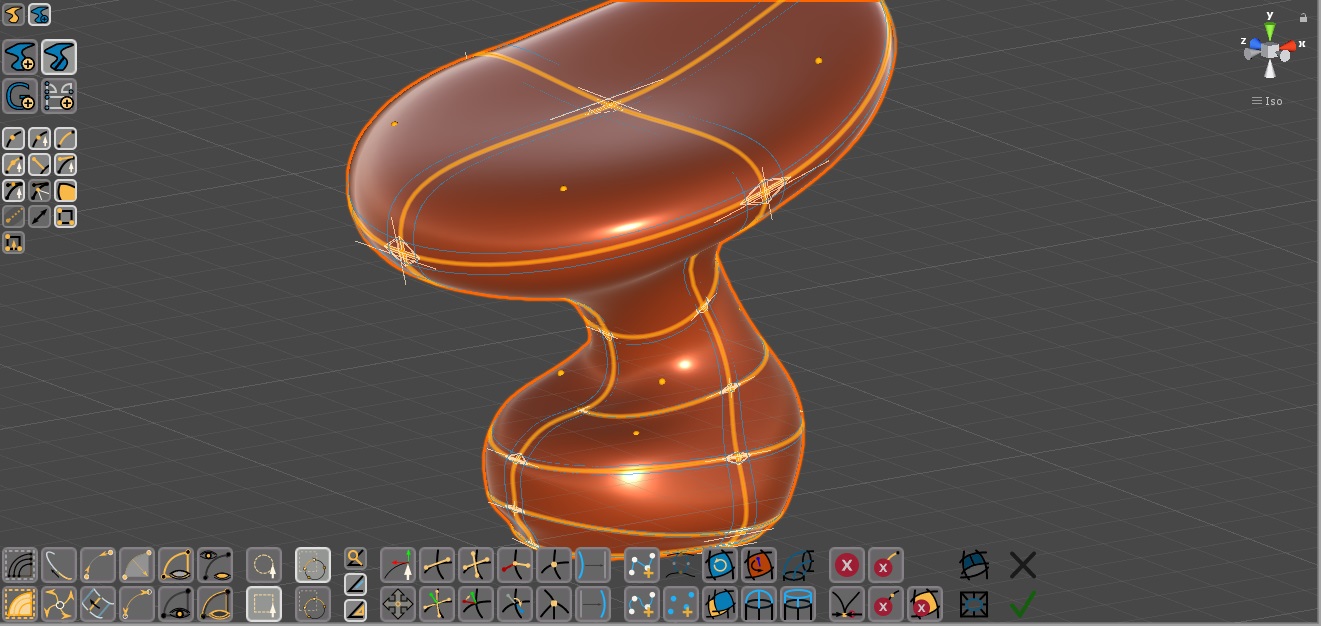
Fig. 1 Edit Operator
The Edit Operator is by far the most complex Operator in Curved Poly Maker. Its main goal is to create custom shapes, that you can subsequently reshape with any shaping tool. What makes this operator harder to use than others is that here you can customize shapes, generating new edges and new polygons and changing the relationships between them. This will force you to deal with aspects of Curved Polys which are completely hidden in other operators.
The number of editing tools is planned to grow in future releases, and that tools will be split into more separated Operators. The actual operator is a set of working things, yet it is part of a continuos development to find better ways and solutions for modeling with Curved Poly.
Edit Operator Menu

Fig. 2 The many parts of the Edit Operator Menu.
The Operator has a big menu organized into 5 parts. Each part will be treated in detail in the next subsections, while many tools and
- (A) Selection and Hiding Actions. Same as the ones on many other operators.
- (B) Tools for Inspecting, Fixing and Handling details of your model.
- (C) Tools to create new Edges and Polygons.
- (D) Tools removing elements.
- (E) Tools which cut elements into more little elements.
Criticalities and Warnings
Some actions and operations available in this operator are pretty much complex and have been tested on many practical situations, yet you may find that your model gets broken if you experiment with them in ways which have not been even considered during development. Here some consideration we want to share with you before you get your models broken:
- You can find some examples of working uses of Edit Operator in this documentation. We are also sharing more through the website and through the youtube channel. Using the Edit Operator the way it is shown on these tutorials should be safe.
- If you want to experiment a way to use the Edit Operator, make a test before breaking a model you have spent hours on.
- Also: while making experiments you should learn to use the Save New button often. You may rely on Undo, but when something gets broken its not guaranted the Undo will be able to safely roll back to the previous state of your model.
- If tutorials aren't enough and you have no idea how to get a specific result, you can ask for help at support.mushroomslabs.com. You will find a dedicated thread for this.
- While editing it is much safer to avoid working on a model splitted into more geometries or with unwraps. If you are working on an imported or inserted model, you can use the geometries operator and the unwraps operator to clean the model from geometries and from unwraps you don't want. If you are working on primitives generated with the Create Operator, you should disable the separate and unwraps options (that is by default). If you create a model from scratch in the Edit Operator every new polygon will be generated on the same geometry without using unwraps.
- If you plan to use often the Edit Operator, you should also spend time to understand how you can fix your models. Curved Polys are complex objects, and in many situations it may be that you see bugged features where instead you only have a bad setup of details like Handles, Editing Normals, Corners or Bindings. Most broken models can be fixed by taking control of this details with tools that you can find in the Edit Operator.
Selection and Hiding
Here you will find common actions for selecting and hiding you can also find in many other operators. As for other operators, you can use a Rectangular Selector and a Circular Selector in Full or Part mode. You may check the Selection Operator and the Hiding Operator for more details about this options and actions.
Please. Take your time to ensure you know how and when to disable
options like  Vertices,
  Edges,
  Handles,
 Polygons. While using this operator there are a lot of practical
situations in which its useful to simplify what is rendered in the view or which elements are interacting with selection tools. You can find more in the chapter About User Interface and Settings
Polygons. While using this operator there are a lot of practical
situations in which its useful to simplify what is rendered in the view or which elements are interacting with selection tools. You can find more in the chapter About User Interface and Settings
Be careful about things hidden with the Hide Operator or common Hide Actions. When you work on your custom shapes, you need to select elements before you can activate most of the tools. That said, most of the tools will work on elements you have selected but also to other elements which are connected (in many ways) to the ones you have selected. For instance, if you have selected a vertex, all the edges and handles and polygons attached to that vertex may be affected by the tools. That elements will be affected also when they are hidden: hidden elements can't be targeted directly by the tools since they don't contribute to selection while hidden, but they may change if they are linked to elements which are selected. You should plan carefully how you hide things, because there is the risk you don't see important changes happening in your model.
Inspecting and Fixing Tools
Here the list of actions in the Inspecting and Fixing area: you will find more informations about this in the section dedicated to Inspecting and Fixing.
 Show Corners: draw the Corners. This may slow down Curved Poly
performance on large models.
Show Corners: draw the Corners. This may slow down Curved Poly
performance on large models. Show Edge Bindings: draw the Edge Bindings. Availability: this
can be enabled only after you have enabled corners drawing.
Show Edge Bindings: draw the Edge Bindings. Availability: this
can be enabled only after you have enabled corners drawing. Selection Inspector: activate the selection inspector which writes
structural informations about your selected elements. This may slow down Curved Poly performance, especially when you have a lot of selected elements.
Selection Inspector: activate the selection inspector which writes
structural informations about your selected elements. This may slow down Curved Poly performance, especially when you have a lot of selected elements. Transform Selection: this is a simplified version of the Selection
Operator. Note: this is an operation, (not an operator) and you need to apply (or close)
before you can do anything else. You can use it for fast transforms without having to switch to another operator. Availability:
you need to have at least one selected vertex.
Transform Selection: this is a simplified version of the Selection
Operator. Note: this is an operation, (not an operator) and you need to apply (or close)
before you can do anything else. You can use it for fast transforms without having to switch to another operator. Availability:
you need to have at least one selected vertex. Change Handles: this is a simplified version of the Pointings
Operator. Note: this is an operation, (not an operator) and you need to apply (or close)
before you can do anything else. This is much useful if you need to correct handles and normals in order to fix your corners while the Show
Corners option is active, since corners are hidden in Pointings Operator.
Change Handles: this is a simplified version of the Pointings
Operator. Note: this is an operation, (not an operator) and you need to apply (or close)
before you can do anything else. This is much useful if you need to correct handles and normals in order to fix your corners while the Show
Corners option is active, since corners are hidden in Pointings Operator. Auto Align Handles: looks for possible alignments across your
selected vertices and generate alignment constraints on them.Availability: you need to
have at least one selected vertex.
Auto Align Handles: looks for possible alignments across your
selected vertices and generate alignment constraints on them.Availability: you need to
have at least one selected vertex. Quad Align Handles: force more alignments across any selected
vertex, and eventually corrects its handles positions. It works only on vertices with an even number of attached handles and the alignments are generated by matching opposite handles. Availability:
you need to have at least one selected vertex.
Quad Align Handles: force more alignments across any selected
vertex, and eventually corrects its handles positions. It works only on vertices with an even number of attached handles and the alignments are generated by matching opposite handles. Availability:
you need to have at least one selected vertex. Break Alignments: remove any alignment on selected vertices. Availability:
you need to have at least one selected vertex.
Break Alignments: remove any alignment on selected vertices. Availability:
you need to have at least one selected vertex. Normalize Handles Directions: check all smooth vertices in your
selection for handles not satisfying the smoothness condition and correct them. Depending on the case, it make make sense to do this after Fix
Normals. Availability: you need to have at least one selected vertex.
Normalize Handles Directions: check all smooth vertices in your
selection for handles not satisfying the smoothness condition and correct them. Depending on the case, it make make sense to do this after Fix
Normals. Availability: you need to have at least one selected vertex. Fix Normals: recompute the normals on all selected vertices. This
may also change the editing normals on attached edges. Availability: you need to have at
least one selected vertex.
Fix Normals: recompute the normals on all selected vertices. This
may also change the editing normals on attached edges. Availability: you need to have at
least one selected vertex. Flip Normals: flips the normals on all selected vertices and edges.
Be careful while flipping normals, normals play a very important role in interpolation algorithms and the shape of polygons attached to that vertices and edges may change in ways you don't want. Availability:
you need to have at least one selected vertex.
Flip Normals: flips the normals on all selected vertices and edges.
Be careful while flipping normals, normals play a very important role in interpolation algorithms and the shape of polygons attached to that vertices and edges may change in ways you don't want. Availability:
you need to have at least one selected vertex. Make Vertex Smooth: Force any selected vertex to become smooth.
Availability: you need to have at least one selected vertex.
Make Vertex Smooth: Force any selected vertex to become smooth.
Availability: you need to have at least one selected vertex. Make Vertex Sharp: Force any selected vertex to become sharp.
Availability: you need to have at least one selected vertex.
Make Vertex Sharp: Force any selected vertex to become sharp.
Availability: you need to have at least one selected vertex. Make Edges Linear: Force any selected edge to become linear. In
the process the handles of curved edges will be removed from the model. Availability: you
need to have at least one selected edge.
Make Edges Linear: Force any selected edge to become linear. In
the process the handles of curved edges will be removed from the model. Availability: you
need to have at least one selected edge. Make Edges Curved: Force any selected edge to become curved. In
the process two new handles will be generated for any linear edge. If the vertices of the edge are smooth, the new handles will be placed in order to satisfy the smoothness condition for handles. Availability:
you need to have at least one selected edge.
Make Edges Curved: Force any selected edge to become curved. In
the process two new handles will be generated for any linear edge. If the vertices of the edge are smooth, the new handles will be placed in order to satisfy the smoothness condition for handles. Availability:
you need to have at least one selected edge.
Creation Tools
This is where to start if you want to make a model from scratch.You will find more informations about this in the section dedicated to Custom Primitives
 Put Edges: activate the Put Edges Operator which allows you to
draw Curved Edges.This is one of the most important tools in the Edit Operator.
Put Edges: activate the Put Edges Operator which allows you to
draw Curved Edges.This is one of the most important tools in the Edit Operator.  Put Lines: activate the Put Lines Operator which allows you to
draw Linear Edges.
Put Lines: activate the Put Lines Operator which allows you to
draw Linear Edges. Put Vertex: activate the Put Vertex Operator which allows you
to add separated vertices.
Put Vertex: activate the Put Vertex Operator which allows you
to add separated vertices. Make a Circle: activate the Make a Circle Operator which allows
you generate a circle connecting two selected vertices. Availability: you need to have
2 (and only 2) selected vertices
Make a Circle: activate the Make a Circle Operator which allows
you generate a circle connecting two selected vertices. Availability: you need to have
2 (and only 2) selected vertices Make Polygons: automatically generate polygons. It only generates
polygons attached to any of your selected vertices. Possible candidates for polygons generation are found by Curved Poly starting from the Corners on the selected vertices: if somethings goes wrong, you may have some corners or bindings to fix . This is one of the most important
tools in the Edit Operator. Availability: you need to have at least one selected vertex
Make Polygons: automatically generate polygons. It only generates
polygons attached to any of your selected vertices. Possible candidates for polygons generation are found by Curved Poly starting from the Corners on the selected vertices: if somethings goes wrong, you may have some corners or bindings to fix . This is one of the most important
tools in the Edit Operator. Availability: you need to have at least one selected vertex Duplicate: activate the Duplicate Operator which allows you duplicate
your selection. The duplicated elements can then be moved around before you confirm the operation. This
is one of the most important tools in the Edit Operator.Availability: you need to have
at least one selected vertex.
Duplicate: activate the Duplicate Operator which allows you duplicate
your selection. The duplicated elements can then be moved around before you confirm the operation. This
is one of the most important tools in the Edit Operator.Availability: you need to have
at least one selected vertex. Flip Polygons: flip all selected polygons. Availability: you
need to have at least one selected polygon.
Flip Polygons: flip all selected polygons. Availability: you
need to have at least one selected polygon. Create Hole Joints: create a set of polygons which fills an hole.
The hole should be setup to be made of a closed set of aligned handles, otherwise the hole will only be filled partially. You only need to select one of the edges in the hole to activate this, but you may use Grow
Through Alignments to check if the hole is made of a closed set of aligned handles first.
Availability: you need to have at least one selected edge
Create Hole Joints: create a set of polygons which fills an hole.
The hole should be setup to be made of a closed set of aligned handles, otherwise the hole will only be filled partially. You only need to select one of the edges in the hole to activate this, but you may use Grow
Through Alignments to check if the hole is made of a closed set of aligned handles first.
Availability: you need to have at least one selected edge Create Bridge Joints: create a set of polygons which connects
two separated holes. The holes should be setup to be made of a closed set of aligned handles, otherwise the holes will only be connected partially. You only have to select one of the edges of each the two holes to activate this. Availability:
you need to have exactly 2 (and only two) selected edges.
Create Bridge Joints: create a set of polygons which connects
two separated holes. The holes should be setup to be made of a closed set of aligned handles, otherwise the holes will only be connected partially. You only have to select one of the edges of each the two holes to activate this. Availability:
you need to have exactly 2 (and only two) selected edges. Extrude Path: create a set of polygons which extrude a path of
aligned edges. Any selected edge will be automatically extended through its alignments. Only edges having no more than one polygons attached can be extruded. Availability:
you need to have at least one selected edge.
Extrude Path: create a set of polygons which extrude a path of
aligned edges. Any selected edge will be automatically extended through its alignments. Only edges having no more than one polygons attached can be extruded. Availability:
you need to have at least one selected edge.
Tools for Removing Elements
 Remove Doubles (and Weld Edges): activate the Removed Doubles
operator which can also weld Edges. This is one of the most important tools in the Edit
Operator. Availability: you need to have something selected.
Remove Doubles (and Weld Edges): activate the Removed Doubles
operator which can also weld Edges. This is one of the most important tools in the Edit
Operator. Availability: you need to have something selected. Cancel: cancel any selected element. Availability: you need
to have something selected.
Cancel: cancel any selected element. Availability: you need
to have something selected. Cancel Vertices: cancel any selected vertex. Availability:
you need to have some selected vertex.
Cancel Vertices: cancel any selected vertex. Availability:
you need to have some selected vertex. Cancel Edges: cancel any selected edge. Availability: you need
to have some selected edge.
Cancel Edges: cancel any selected edge. Availability: you need
to have some selected edge. Cancel Polygons: cancel any selected polygon. Availability:
you need to have some selected polygon.
Cancel Polygons: cancel any selected polygon. Availability:
you need to have some selected polygon.
Tools for Cutting Elements
 Circular Hole Operation: cut an hole around a vertex. The hole
can be subsequently used as a starting point for other Creation operators. Despite the name, the cut is not necessarily a circle and it may be useful to use Circleify (See Shape Control Operator). Availability:
you need to have 1 (and only 1) vertex selected.
Circular Hole Operation: cut an hole around a vertex. The hole
can be subsequently used as a starting point for other Creation operators. Despite the name, the cut is not necessarily a circle and it may be useful to use Circleify (See Shape Control Operator). Availability:
you need to have 1 (and only 1) vertex selected. Subdivide Edge Operation: split an edge into two edges. This split
can be extended through adjacent polygons, splitting both edges and polygons. This is one
of the most important tools in the Edit Operator. Availability: you need to 1 (and
only 1) edge selected.
Subdivide Edge Operation: split an edge into two edges. This split
can be extended through adjacent polygons, splitting both edges and polygons. This is one
of the most important tools in the Edit Operator. Availability: you need to 1 (and
only 1) edge selected.
<< Prev Next >>