Curved Poly
Intro
General Features
version 1.3 News
about the Shadow Framework
Setup
How to Start
Editor Interface
Editor Windows
Tools Sets
Assets
Assets Worflow
Game Objects
Assets Upgrade to 1.3
Common Tools
Selection
Hiding and Visibility
Parts List
Shape Tools
Selection Transform
Backgrounds
Handles and Edges
Polygons
Shaping Options
Tessellation
LoDs Assets
Hints (A to P)
Composition Tools
Primitives
Custom Parts
Compositing
Materials Tools
Unwraps Tools
UV Panel
Advanced Shape Tools
Shape Edit Tools
Shapes Customization
Cutting and Splitting
Making Shapes
Exploiting other Tools
Issues and Fixing
Curves and Surfaces
Free Paths
Parametric Curves
Generating Surfaces
Update Surfaces
Tessellation
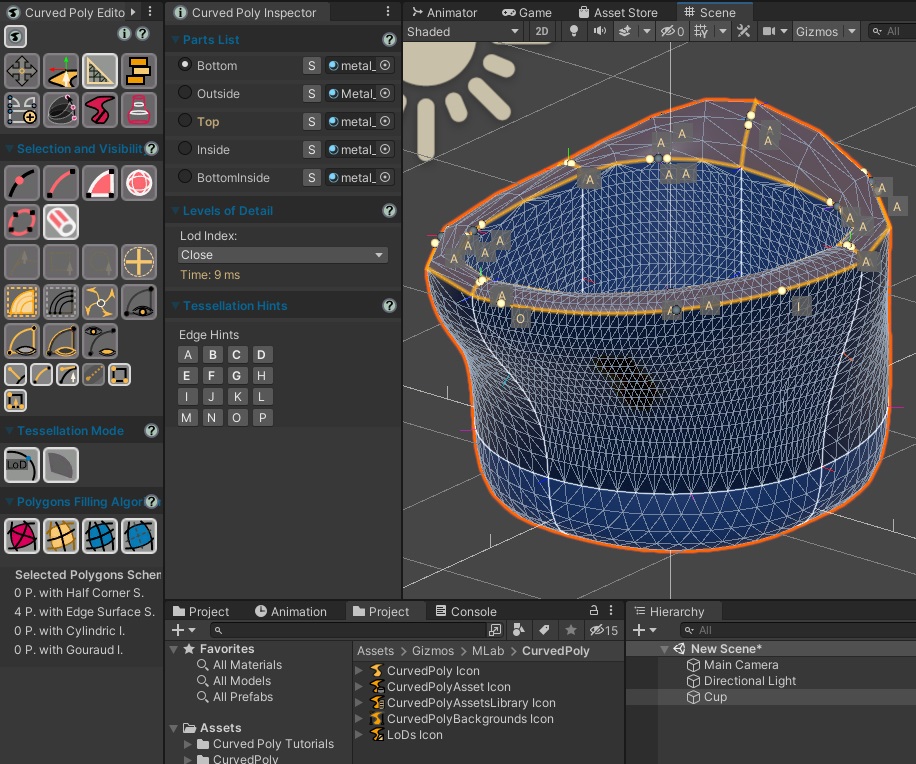
Fig. 1 Tessellation Tools Set
Curved Polys tessellation into real polygons is all about determining how much segments should be used to tessellate each curved edge. Then, the Filling Algorithms on each polygon will do the rest.
Tessellations Tools is dedicated to the setup of Tessellation Hints and other tessellation settings. Tessellation Hints are little labels (all the characters from A to P, in alphabetical order) which describe how much segments should be used to tessellate an edge.
Since we are working deeply on the way curved polygons are tessellated into real polygons here, it is a good idea to do something to visualize a wireframe of such polygons. In unity this can be done in the Scene Toolbar either from Gizmos>Selection Wire, or changing the Shading Mode from Shaded to Wireframe or Shaded Wireframe.
The exact number of segments used on each curved edge, is usually defined at Run-Time (or during shaping or editing processes), after a specific Level of Details as been assigned to the entire model; such Levels of Details are defined inside LoDs tables, which are stored in LoDs Assets. Usually, A means a very little amount of segments (the minimum being 1) and P means an impressive huge amount of segments. For practical purposes, We suggest to use only the hints from B to G, reserving the A hint for special situations in which you only need to have a Placeholder* , and all the Hints after G for rare situations or special uses.
If you need to check the impact of editing on more Levels of Details at once, you should use the LoDs preview Window. This can be opened from the Curved Poly Component. Once this window is open, it will show changes happening on your models at different resolutions. You will also see an overview of the total amount of vertices and triangles used by each version of the model.
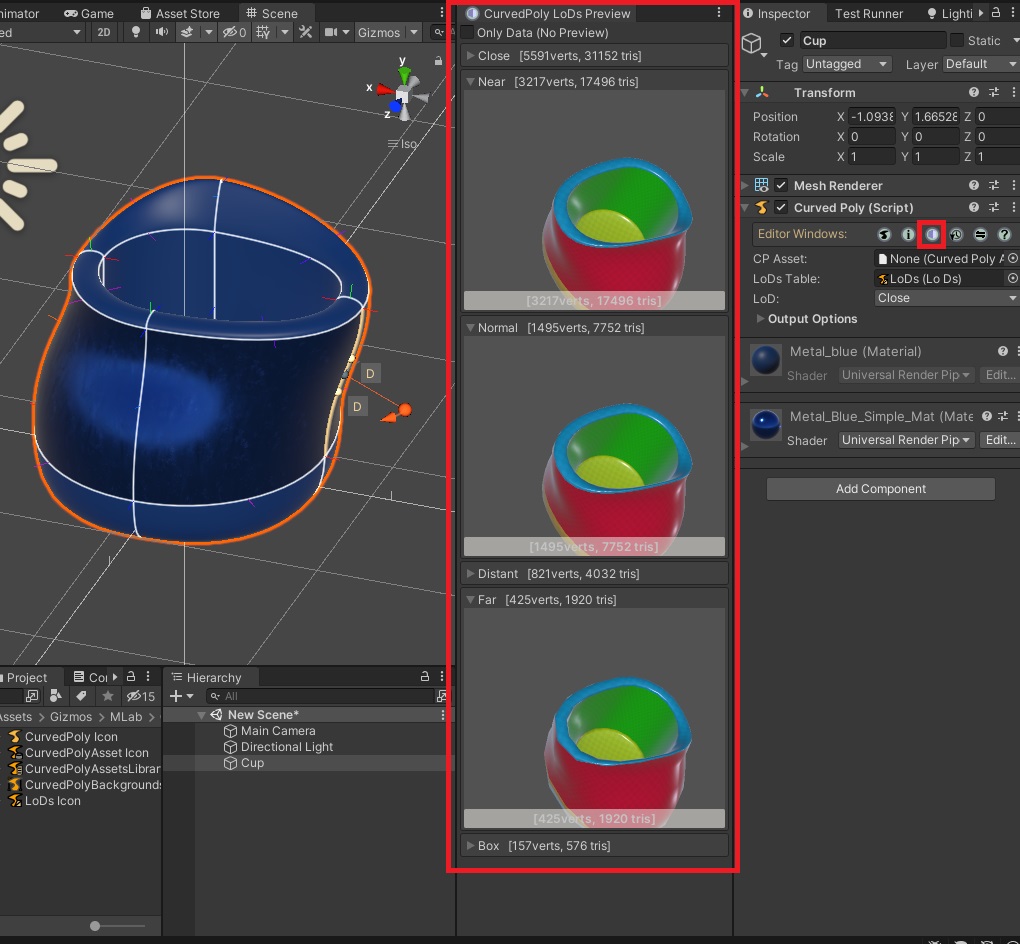
Fig. 2 Curved Poly LoDs Preview
Furthermore, for a complete interaction with the model, we have added to Tessellation Tools a control over Polygons Filling Algorithms, not different from the one used in Shape Tools. With this control you can correct potential issues generated on polygons after the changes made to hints and level of details, and also try different combination of filling algorithms with tessellation data, in case you need to lower the computation time of tessellation.
Fixed Tessellation vs Runtime Tessellation
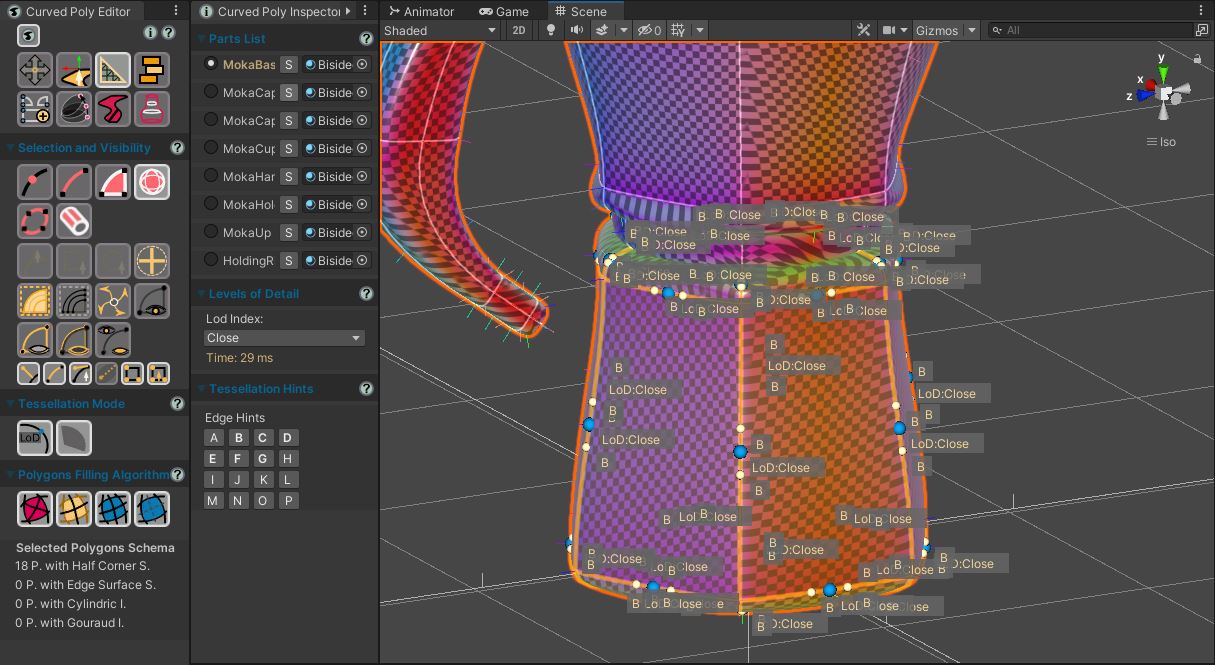
Fig. 3 A model with some edges marked with fixed tessellation ('Frozen' edges). When you do this, you shall use the LoDs Preview Window to check how much the vertices and triangles are changing on your model on all LoDs while you are freezing its edges.
You can mark an edge (any edge) for Fixed Tessellation. When you do so, even if the Level of Details changes on a model, that edges will keep using the same amount of segments with the same distribution. A fixed tessellation is generated using the actual LoDs on the .
You first need to select the Brush LoD option ( ). Then, you must take a LoD option:
- Runtime Tessellation (default): use this to mark any edge on the model for Runtime Tessellation. This is assigned by default to all edges, so if you want to have only edges with runtime tessellation you don't need to come here. Edges with runtime tessellation are marked on the Scene View with a little gray sphere in the central position.
- LoDs Options: if you use the default LoDs these will be Close, Near, Normal, Far, Distant and Box. Otherwise, you will find here the names of your custom LoDs. Choose this to freeze an edge to use that specific LoD regardless of LoD choice on this asset. Such edges will be precomputed, meaning that Curved Poly will store a pre-tessellated polyline in the Curved Poly Asset rather than the edge itself(edge data will still be available through the Editing Asset, so you can restore Runtime Tessellation with the Editor). Edges with Frozen tessellation are marked on the Scene View with a little plate showing the name of the LoD choosen for fixed tessellation.
<< Prev Next >>