Curved Poly
Intro
General Features
version 1.3 News
about the Shadow Framework
Setup
How to Start
Editor Interface
Editor Windows
Tools Sets
Assets
Assets Worflow
Game Objects
Assets Upgrade to 1.3
Common Tools
Selection
Hiding and Visibility
Parts List
Shape Tools
Selection Transform
Backgrounds
Handles and Edges
Polygons
Shaping Options
Tessellation
LoDs Assets
Hints (A to P)
Composition Tools
Primitives
Custom Parts
Compositing
Materials Tools
Unwraps Tools
UV Panel
Advanced Shape Tools
Shape Edit Tools
Shapes Customization
Cutting and Splitting
Making Shapes
Exploiting other Tools
Issues and Fixing
Curves and Surfaces
Free Paths
Parametric Curves
Generating Surfaces
Update Surfaces
Editor Windows
In order to activate Curved Poly Editor we need to access the Editor Window. You can find it under Tools>Curved Poly>Editor window

Fig. 1 Accessing the main Editor Window. From the same menu you can open all other windows used by Curved Poly Editor.
This window contains all the tools you need to work on your Curved Poly Models, and should always be opened while you edit them. It can be docked vertical on any side of the screen, or it can be docked horizontal, maybe in the bottom of the Scene Window, where all icons are placed in a more compact way without sections titles or support buttons.

Fig. 2 Setup of Curved Poly Editor main Windows, with the Curved Poly Editor Window placed vertically on the left.
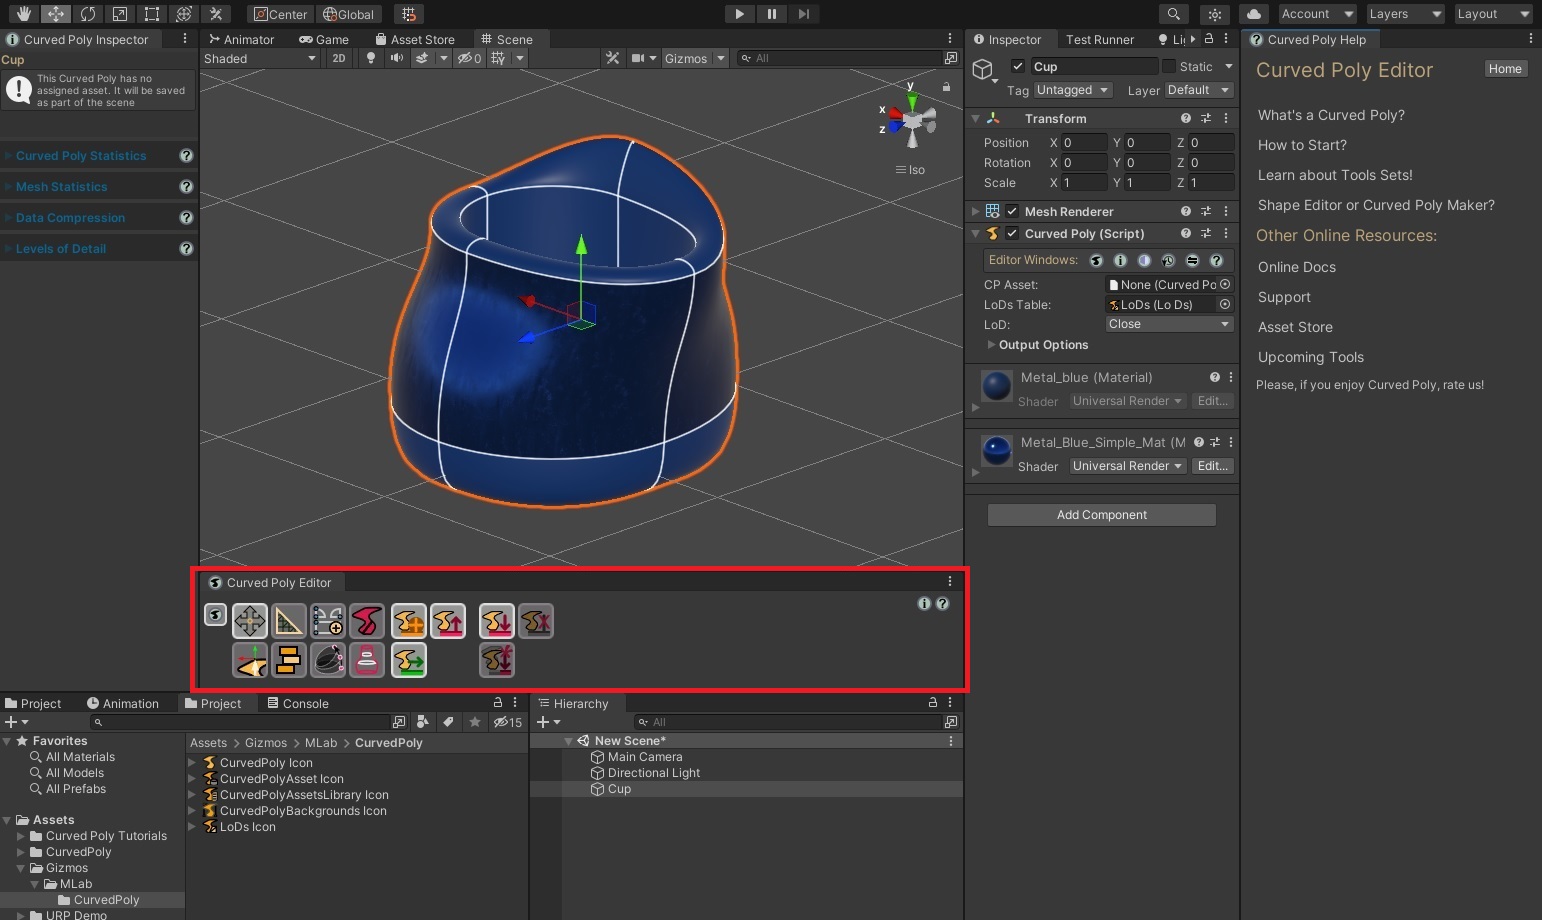
Fig. 3 Setup of Curved Poly Editor main Windows, with the Curved Poly Editor Window placed horizontally below the Scene.
Another important window we want to use is the Curved Poly dedicated inspector. You can access it directly from the Editor Window, or from the Menu. This window contains further instruments and details about the tools used in Curved Poly and having it available is somehow important to get full control other them.
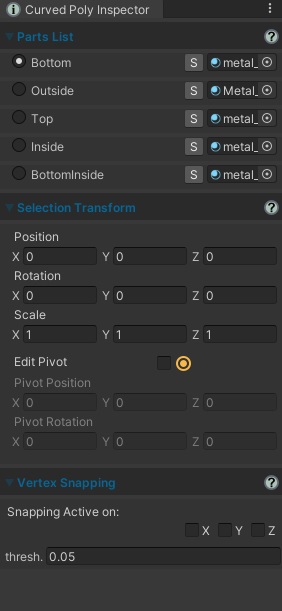
Fig. 4 The Dedicated Inspector is required to access all the features of the Editor, even the ones which are not accessible from the main Editor Window. It's content changes according to the actual Tools Set selected in the Editor, and it can also change interactively depending on how you interact with the Editor in Scene. Here we are showing the default state of the Dedicated Inspector, while the Shape Tools Set is opened.
Furthermore, if you are new to this editor, you should consider
opening the in-line documentation, which can be accessed from the ![]() question mark icon. From this
window you will be able to learn more about the tools, check the details of every parameter and also grab some tip about how specific tools shall be used.
question mark icon. From this
window you will be able to learn more about the tools, check the details of every parameter and also grab some tip about how specific tools shall be used.

Fig. 5 This is the main Curved Poly Help window, an interactive window showing a description of tools used by Curved Poly. Its contents change according to the tools you are using, and you can force a specific content both from the Editor Window, or from the Dedicated Inspector, by hitting the question mark icon.
Once you interface is up, the best thing to do is to import a premade model into the scene using the import button. While you work on the model, the documentation window will keep update according to the tools you are using, showing you how to use them. And you can press on the question mark button to know more about the tools around.
On top of the Editor Window you will find the main tool sets, each one being a set of tools which are useful in a different stage of modeling. Clicking on one of this icon will change the content both of the editor window and of the dedicated inspector. In some cases you may give your editor window a different position: since version 1.3 of curved poly we have reworked the structure of this toolset; the goal was to limit the number of times you need change toolset in order to operate on your shapes.
Again, once you have the editor window and the dedicated inspector setup for a specific tools, the documentation window will shows details of the tools you are using.
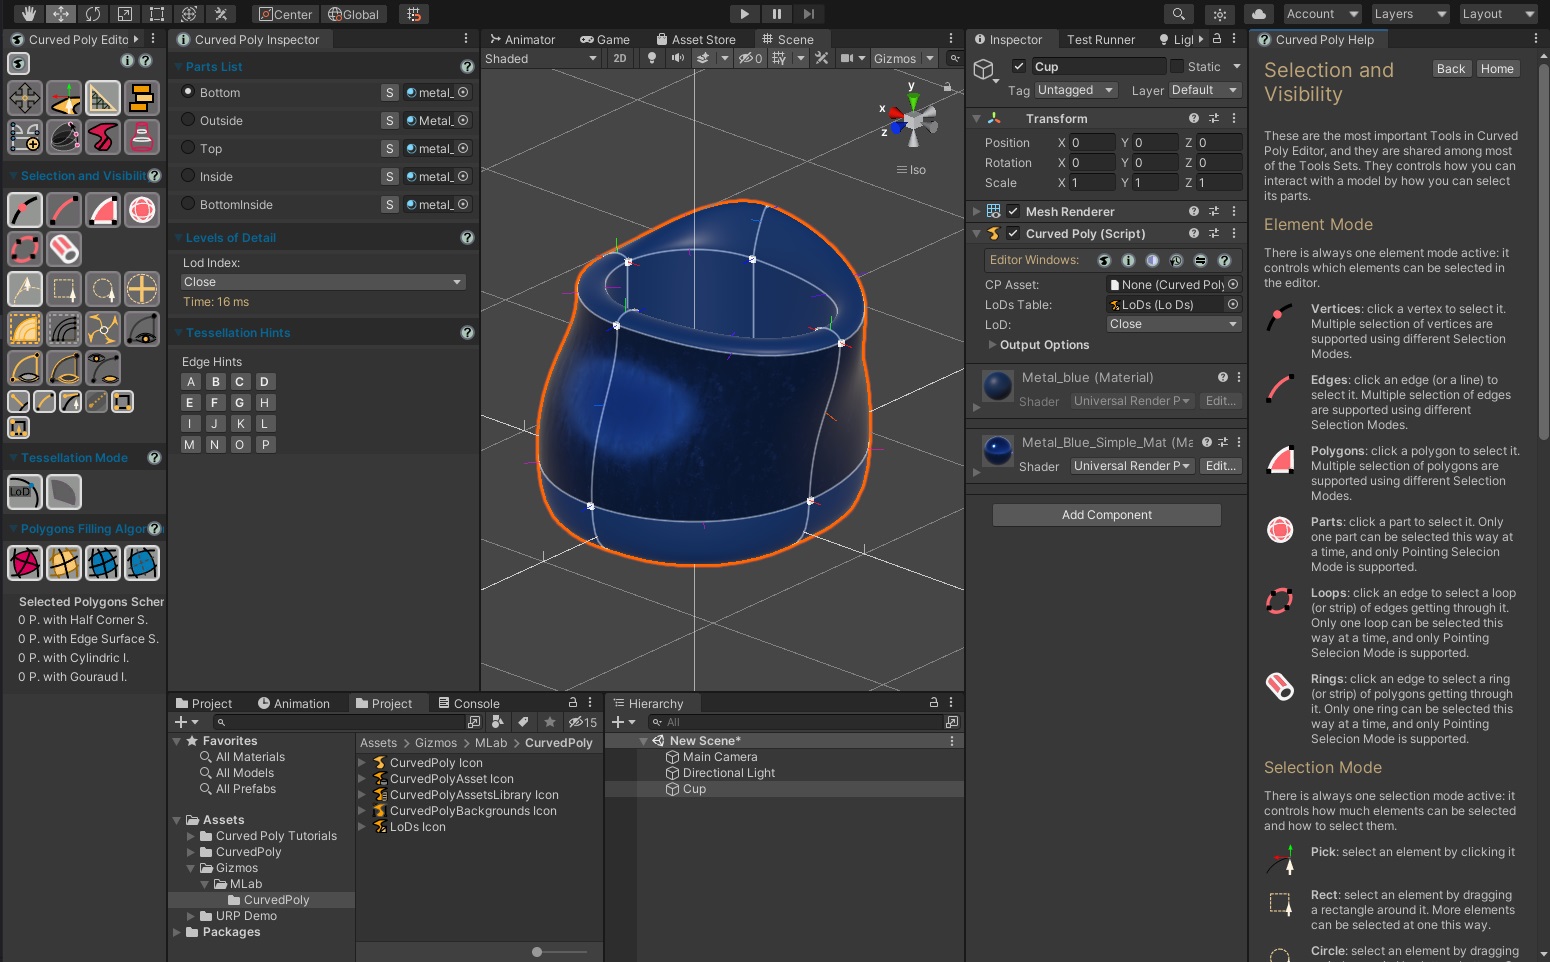
Fig. 6 Curved Poly Windows alternative State while the Tessellation Tools Set is active, and with Selection and Visibility Docs visualized.
There are again a few more window you should consider, but they are not mandatory. You can access a full list of windows also from the main Unity Inspector under an instance of Curved Poly Component.
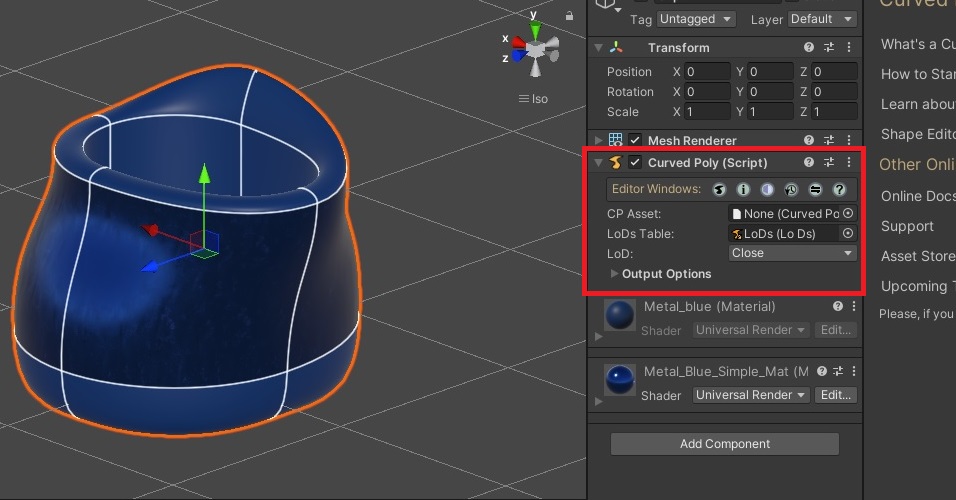
Fig. 7 The Curved Poly Component, in the main Unity Inspector. At the beginning of the component, you can find a list of icons, one for each available window. This is an alternative way to access the editor interface.
Here we can open the history, with the full list of changes you made on the model which can be undone
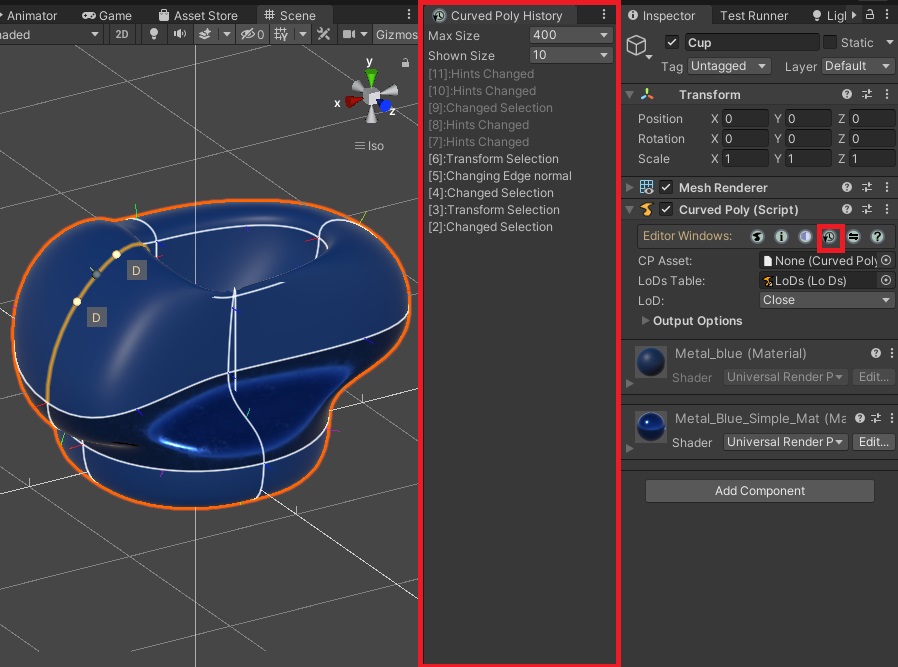
Fig. 8 Curved Poly History Window and how to access it.
And the settings window where you can find a few settings.
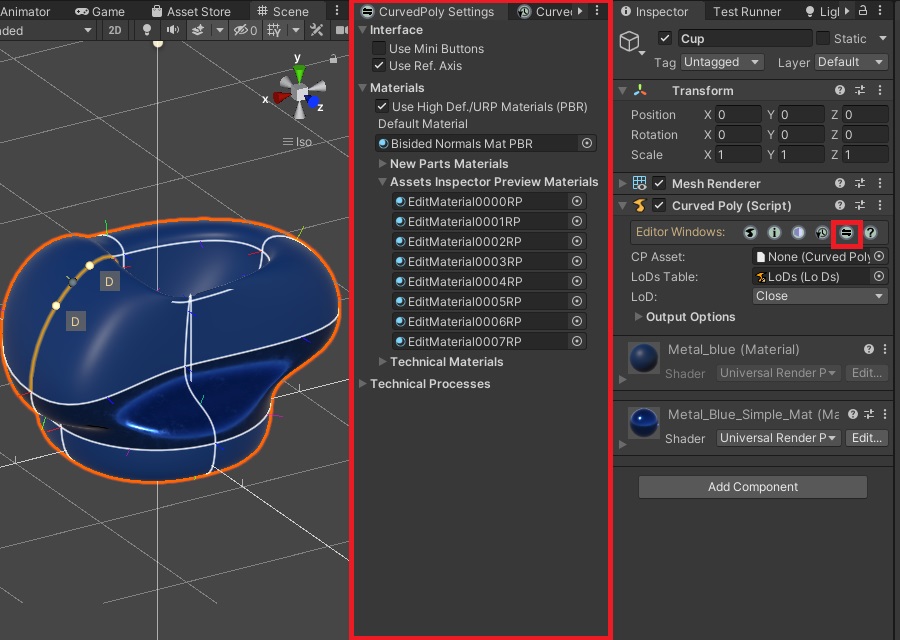
Fig. 9 Curved Poly Settings Window and how to access it.
Last but not least, there is the LoDs preview window which is used to give you a preview of your model as it is tessellated with different Levels of Details. The available LoDs shown in the window are the ones used by a Curved Poly component, which can be customized as we will see later in a dedicated section. The previewer is useful, but not strictly necessary since you can preview your model on different Levels of Details from the inspector choosing a different LoD for the model itself. It may be also useful to active the Selection Wire option on the Scene to see how exactly the model is tessellated on different LoDs.
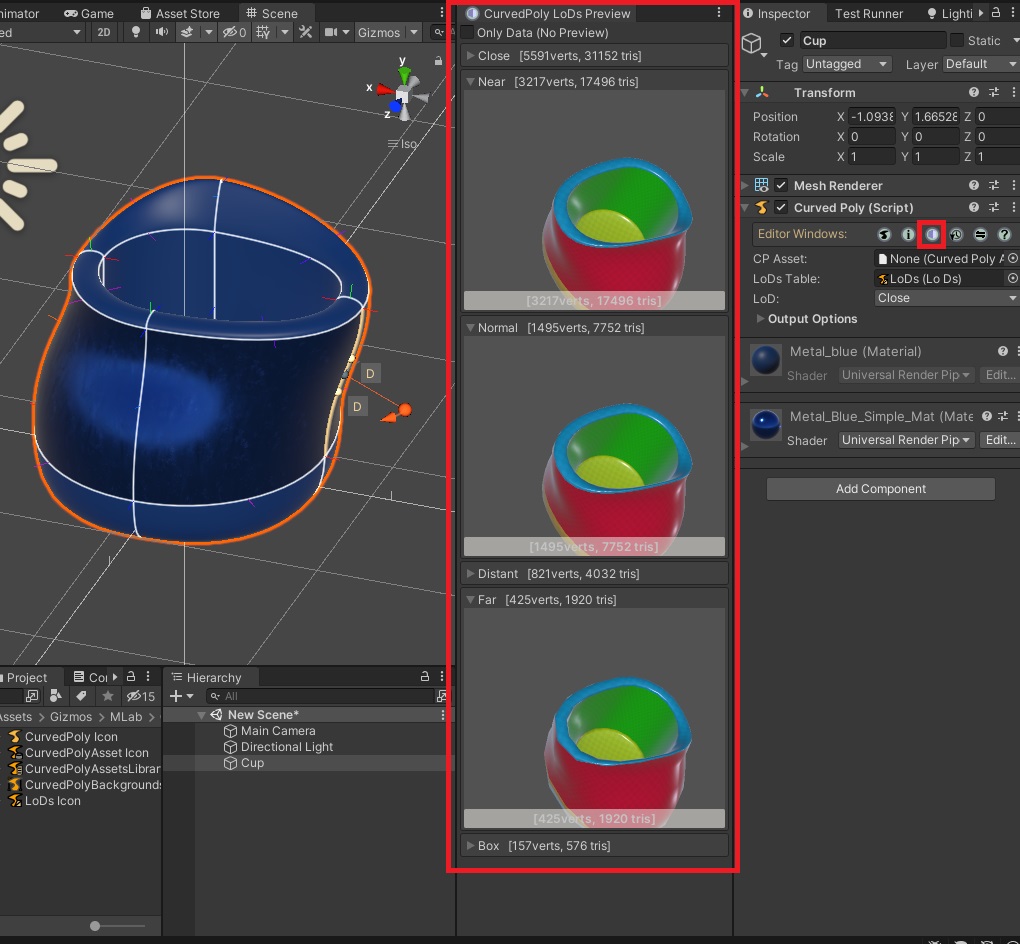
Fig. 10 Curved Poly LoDs Preview
<< Prev Next >>